Wood Dye Colors – Formulas

Gray Wood Stain Demonstration Using Wood Dye

Making Gray Wood Stain Using Keda Dye is Very Easy To Do.

The Mixture

The formula I used was:

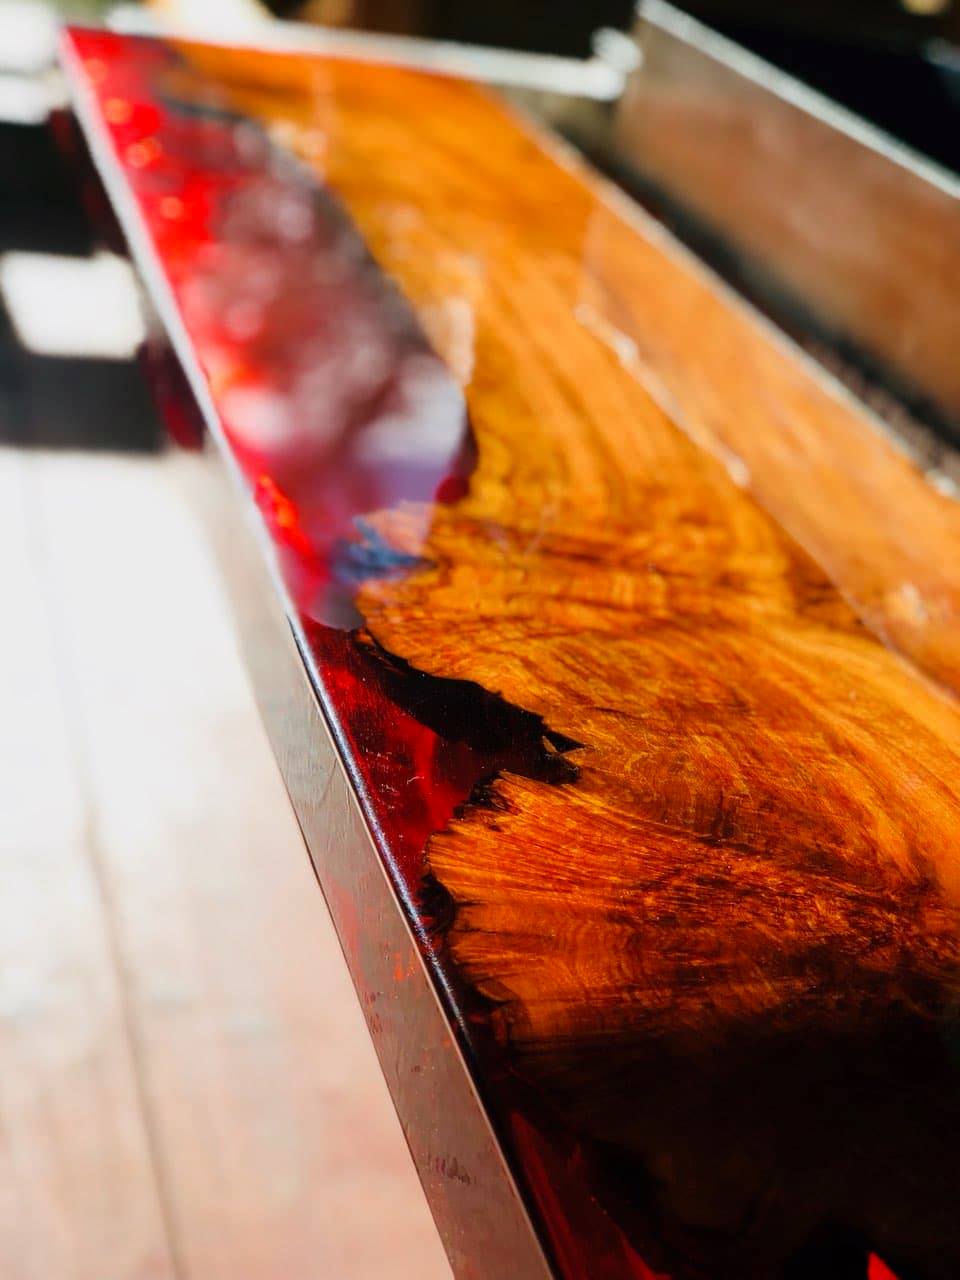
To start, I mix 1/8th Tsp. of Keda Dye’s Coal Black Dye Powder (or 0.5 Grams) powder dye into 1 oz. warm water. I then added 7 oz. of Isopropyl alcohol to the 1 oz. water dye mixture. You could just use 8 oz. of warm water though. However, I liked the look and the faster dry time using the 70%-91% rubbing alcohol for my project. Diluting the Keda Coal Black powder dye creates this beautiful silver gray stain color, and has an amazing wood finishing depth.

Wood Used

The main project was made from a lower grade, solid wood “Curly Maple”. I also used a store bought Pine, as well as double A grade Quarter Sawn Maple, with a Rotary Cut Maple Veneer B side laid up on MDF core. The last two woods were primarily for showing the same gray dye stain color on different woods.

Wood Prep

On this project the prep work used for all the woods, consisted of sanding the wood with a 150 grit sandpaper. I did blow off the saw dust, with compressed air. This was also followed by wiping down the pre colored wood with the 91% Isopropyl Alcohol, and a lint free microfiber towel to remove any dust still lingering behind. After cleaning the wood with the alcohol, I allowed the rubbing alcohol to completely dry before the stain application process.

Wood Stain Application

I began the gray stain application process. I flooded the wood surface with the gray stain mixture, and worked the wood dye into the grains of the wood. The dyes absorbed and dried relatively quickly. Personally, I typically like to wipe the stained wood down with a clean, lint free cloth, prior to fully drying. This helps to lift off any loose wood dyes, and helps prevent any possible wood stain pooling.

For the second round for the gray dye solution, was to be a little more controlled during the application process. I did not flood the surface quite as heavily. I did wipe off the excess wood stain off fairly quickly in an effort to get that silver gray look.

Sealing The Gray Stain Into The Wood

Once I was certain the gray dye stain had fully dried, I followed that up with sealing the stained wood with a spray can of gloss lacquer from Deft. I did not wet sand or polish the lacquer at all. After all, these blanket holders are going to be in my closet. I did however, do an in-between coat sanding about an hour after the 2nd coat of lacquer had dried. 3 coats of the lacquer in total were applied, but you certainly could add more. This really was a very simple DIY project. Hopefully it has provided a good visual for getting that transparent, clean, gray wood stain look, and helps someone out.

You can buy Keda wood dye on our ordering information page located here: Buy wood dye

Red epoxy resin on live edge using Keda red liquid dye

The Secret to Beautiful Wood Staining with Keda Dye Products

Are you tired of ordinary wood staining products that leave your furniture looking dull and lifeless? Look no further than Keda Dye products. Keda Dye is the expert in wood staining, with a range of high-quality products that will turn any dull piece into a captivating masterpiece. As an experienced and reliable provider of wood staining products, Keda Dye makes sure that all of its products come with a long list of unique qualities that set them apart from competitors.

Versatility – Keda Dye products are incredibly versatile, with an endless range of colors to choose from. Whether you are looking for a bold and vibrant finish or a subtle and natural tone, Keda Dye has you covered. Their products are perfect for DIY enthusiasts and professional woodworkers alike and can also be used on a wide variety of surfaces and wood types.

Quality – Keda Dye products are made with the highest quality ingredients, resulting in a product that produces rich, vibrant colors that will last for years to come.

Customizability – Highly customizable, Keda Dye products can be easily mixed with other colorants, pigments, or resins to create your own custom hue.

Easy to Use – Keda Dye products are straightforward to use, even for beginners. They come with clear instructions and quick-drying formulas that make them ideal for those with less experience with wood staining.

Alcohol Dye Colored Wood Filler & Unique Oak Wood Stain Finishes

Using Alcohol Dye Liquids in Making Colored Wood Filler on Unique Finishes As An Oak Wood Stain and Other Deep Grained Woods.

Mixed Keda alcohol wood dye into wood filler to darken oak grain with the newly colored grain filler. Keda Wood Dye was used to make this unique finish, and applied the liquid dye version to make this gorgeous golden brown stain with popping oak grains.

Coloring wood filler:
1 tablespoon Wood Filler to 1 tablespoon warm water and added 10 drops to 1/8th tsp Keda Black liquid dye

Golden Brown Stain Formula:
4 ounces Lacquer thinner (or denatured alcohol for alcohol based dye stain version)
1/8th Tsp Keda Amber Yellow Liquid Dye
10 Drops Keda Walnut Brown Liquid Dye
5 Drops Keda Crimson Red Liquid Dye

Pecan Wood Dye – Making A Master Color Chip

Ever mix some wood dyes or wood stain colors together? Then proceed in the wood coloring process, only to find 3 months later, that you would like to recreate that same color for a nice matching table, or perhaps bring new life into an old wooden door with that same color. However, you go to grab the mixed stain, only to find there is none left. Here is a great wood coloring tip that may help you have the ability to recreate mixing dyes for that same exact finish.